Leaderboard
Popular Content
Showing content with the highest reputation on 12/14/21 in all areas
-
[GAME MODERATOR] @Robin. transfers to the position of Report Moderator due to personal reasons.29 points
-
26 points
-
23 points
-
10 points
-
[GAME MODERATOR TRAINER + TRIAL TRANSLATOR] @szykaro23 has been promoted to Translator, while remaining in the Game Moderation Team.5 points
-
After sending out custom Christmas cards to some Phoenix (staff) members, @chaotic-control decided to return the favour, as a thank you for my hard work the past year. Thanks a lot, team. I can't wait to see what 2022 will bring us.4 points
-
4 points
-
4 points
-
[GAME MODERATOR LEADER] @Gnl_Hugh122 leaves the team due to lack of time. [GAME MODERATOR + EVENT TEAM] @Smacky. leaves the Game Moderation Team due to personal reasons. However, they will remain in the Event Team.4 points
-
3 points
-
[EVENT TEAM] @Beany001 has been removed from the TruckersMP Team due to security reasons.3 points
-
2 points
-
Hello, I've got some solutions for your question and maybe you shoud try them: 1) Please check if there is an update for the driver of the wheel avaible for you. If that is not avaible for you, please try to reinstall the driver. 2) Please read this article: https://blog.scssoft.com/2021/10/force-feedback-faq.html (its about new force feedback changes) I took something from here to let you know about news of Force Feedback update: https://store.steampowered.com/news/app/227300/view/3029226631978611053 3) Within the 1.42 update, the force feedback was updated. I personally much rather the new force feedback, as it's much more realistic. But it does take a while to get used to. I'd strongly recommend you checkout the following blog article by SCS Software regarding the force feedback changes: https://blog.scssoft.com/2021/10/force-feedback-faq.html This article explains all the force feedback settings, so you can configure it to your liking. It also explains how you can your old force feedback back, if you preferred the old force feedback. 4) Try changing the setting: Engine resonance. Set it so that the slider is on the left. 5) Make sure you have selected your G29 as a wheel, and got the FFB enabled. Have you made sure the FFB sliders are up in game? Also make sure you have the plug plugged in (I’ve done that a couple times). I’d recommend leaving the settings in G HUB the way they are (from my experience). There seems to be a lot of bugs for G29/G920. I had a problem in ETS2 after changing settings in G HUB, and the only way I found how to fix it was reinstalling G HUB. If you need Logitech G Hub, then you can download it right here: https://support.logi.com/hc/en-in/articles/360025298133 also make sure to get ride of the Gaming Software because GHub Replaces the Software. 6) Maybe this guide here will be helpful for you. Shouldnt or should that helped you out, please let us know. Greetings, n0feaR. Veteran Driver IV2 points
-
2 points
-
2 points
-
2 points
-
2 points
-
Good Morning TMP ❤ Hello again after a long break ?2 points
-
2 points
-
2 points
-
2 points
-
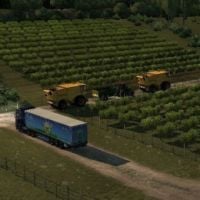
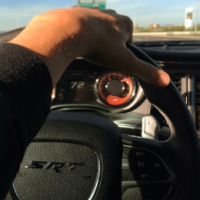
its always nice when you meet other cow trailers was behind this one for most of C-D2 points
-
2 points
-
2 points
-
2 points
-
2 points
-
Hello everyone Welcome to the Male vs Female game Counter Starts at: 1000 Males have to take 1 number (-1) Females have to add 1 number (+1) if the counter goes up 2000, Females wins if the counter goes up 0, Males wins Example: Male: takes 1 = 999 Female: adds 1 = 1000 ....1 point
-
HOW TO GET MORE FPS IN EURO TRUCK SIMULATOR 2(and other games) Hi everyone! In this guide, i'm going to show you how to increase your FPS in Euro Truck Simulator 2 and other games. You're gonna learn some basic tips. If you ready, let's start... Before we start, i'm gonna tell you something. CAUTION! Some solutions may not works with your PC/Laptop! If we're clear, let's roll! 1. Update your graphic drivers 2. Give your GPU a slight overclock(if you had bad cooling system, do not try this!) 3. Boost your PC with an optimization tool 4. Switch out that old HDD and get yourself an SSD 5. Turn off Superfetch and Prefetch 6. Defrag & TRIM your hard disk for faster access 7. Tweak your Intel, AMD or NVIDIA Control Panels 8. Optimise game settings 1. Update your graphic drivers For Nvidia GeForce owners: Go to http://www.geforce.com/drivers. Next, select your graphics card and your Windows version from the list and hit the “Start Search” button. My tip: Always go for the driver marked as “BETA”. This isn’t quite a finished driver, but they all run as stable and good as the final release these days and will likely give you even more performance! For ATI/AMD Radeon owners: ATI/AMD fans go to http://sites.amd.com/us/game/downloads/Pages/downloads.aspx and select the appropriate device. This will give you access to the latest official driver which you can download and install. To get the beta driver with more performance improvements or features, head over to http://support.amd.com/en-us/kb-articles/Pages/latest-catalyst-windows-beta.aspx. For For Intel HD Graphics owners: Mostly found on ultrabooks or tablets, the Intel graphics chipsets are the weakest of the bunch. I wouldn’t recommend doing any sort of gaming on the older integrated Intel HD chipsets (such as the HD 3000 or earlier) – unless you’re heavily into slideshows instead of smooth gameplay – but their latest graphics chipsets are powerful enough to play even recent titles, albeit not at the highest possible resolution or with all the bells and whistles turned on. To get updated drivers go to the Graphics driver page of the Intel Download Center. Wait, how do I even know what graphics card I own? Not a problem: To find out the maker and exact serial number, all you need to do is follow these steps. First, go to “Control Panel” and head to “Hardware and Sound”. From here, click on “Device Manager”: This will bring up a list of all the built-in devices of your system. Head over to where it says “Display adapters”: In these cases, you’ll see an Alienware X51 gaming rig with two graphic chips (the nVidia is usually always the faster one) and a laptop with a GeForce GT 650M. At any rate, make sure you’re using the latest drivers! 2. Overclock your GPU(if you had bad cooling system, do not try this!) Your gaming performance is mostly dependent on the power of your graphics chip – even more so than on how much memory your have or how fast your processor is! The bottleneck and the reason for stuttering gameplay is in almost all cases the graphics chip. To improve performance, you may want to look at running the graphics card beyond the factory speed setting – or in other words: overclocking! Now, 5-10 years ago, I wouldn’t have recommended overclocking as it posed a significant threat to your hardware, but nowadays most systems turn themselves off automatically before they take any damage. Besides, I only recommend a slight overclock by about 10-15%. To overclock the GPU, I recommend two tools: MSI Afterburner –a classic overclocking tool from ASUS. EVGA Precision X – allows overclocking of both the GPU and memory clocks. Using 3DMark 11 I measured that overclocking my system as described above yielded a 10% performance boost: 3. Boost your PC with an optimization tool It's so simple! Boost your PC with an optimization tool. You can try these tools: Razer Cortex(known as Razer Game Booster) AVG PC TuneUp Also uninstall all old programs you don't need. 4. Switch out that old HDD and get yourself an SSD SSDs are much faster than mechanical hard disks and while this most certainly doesn’t boost your game’s frame rate, it will definitely reduce load time in game. My recommendation is to go at least with an SSD with more than 250 GB as most games these days take up between 8-20 Gigabytes. 5. Turn off Superfetch and Prefetch Both SuperFetch and Prefetch are Windows features that are supposed to boost Windows and applications startup times. For games, however, I noticed that loading times and background activity actually increases when these features are enabled. That’s why I recommend turning them both off if you’re an avid gamer. Here’s how: To do this, go to “Control Panel”, “System and Security”, “Administrative Tools”, and “Services”. Scroll down until you see the “SuperFetch” entry, double-click on it, and choose “Disabled”from the list. Hit “OK” and close all windows. Next, open up the registry; click on the Start orb and type in “regedit”. Hit Enter, and go to “HKEY_LOCAL_MACHINESYSTEMCurrentControlSetControlSession ManagerMemory ManagementPrefetchParameters”. Double-click on “EnablePrefetcher” and enter “0” (default value is “3”) to disable the Prefetcher. Note: Please follow the above instructions precisely as deleting or changing the wrong values in the registry may cause problems with your PC. 6. Defrag & TRIM your hard disk for faster access As data is written or deleted from your hard disk, files become fragmented and will physically spread out all over the disk drive. This will lead to a significant performance hit, especially with games, as the hard disk will first need to collect all of these portions in order to be able to fully process the entire file. As both your games and their files usually take up several GBs, it is vital that all of these files can be read in a continuous manner. To defrag the disk, fire up the Start menu, and go to “All Programs”, “Accessories”, “System Tools” and “Disk Defragmenter”. Select your Windows disk, and hit “Defragment disk”. Note, if you have an SSD, you should not defrag. Instead, use the TRIM command to optimize them. In Windows 8, Microsoft integrated the TRIM command into the Disk Defragmenter—so, simply hit “Optimize”. Windows 7 doesn’t offer this, so be sure the TRIM command gets executed regularly. To see if TRIM is enabled, open up a command prompt by clicking on the Start orb and typing “cmd” into the search bar. Right-click on the first result (“cmd”), and click “Run as administrator”. Next, type in the command “Fsutil behavior query disabledeletenotify”, and hit Enter. If this returns the result “= 0″, you’re good to go! Otherwise, TRIM isn’t supported and needs to be enabled. Try entering the command “fsutil behavior set DisableDeleteNotify 0″. If that doesn’t help, a firmware upgrade might be necessary to enable TRIM. 7. Tweak your Intel, AMD or NVIDIA Control Panels For NVIDIA: All NVIDIA drivers come with their own control panels that let you tweak the most essential 3D settings. While you can set many of the following options in-game, some are not available or directly controlled by the driver. This is why it’s always a good idea to go through the list of all options and tweak them to best balance performance and visual quality. To get to the NVIDIA Control Panel, right-click on your desktop, select “NVIDIA Control Panel” and head over to the “Manage 3D Settings” category on the left. These are the some of the lesser known but still important settings to tweak: Maximum Pre-Rendered Frames: This controls the number of frames that the processor prepares before transferring them to the graphics card. Increasing this value results in smoother game play, but you may notice a lag when using the mouse and keyboard. To eliminate the lag, try the “1″ setting. Threaded Optimization: This option should always be “On”, as it allows the support of multi-threaded optimization for modern multi-core processors. VSync: It synchronizes the frames that your graphics card renders with the refresh rate of your monitor. If you disable it, you might find that games run more smoothly; however, you will notice that some parts of the screen might not be rendered correctly and appear to lag. Disable it only if your monitor has a higher frame rate than your gameplay. For ATI/AMD: The AMD/ATI Control Center is another fantastic way to squeeze out more performance and increase the visual quality of your games. To fire it up, right-click on your desktop, select “Radeon Settings” and head over to the “Gaming Settings”. From here you can set individual graphic settings for games you have installed. But i recommend going with the Global Settings as our recommendations usually apply to all games... These are the most important settings: Anisotropic Filtering Mode: The higher this setting is set, the sharper distant textures will appear. However, this will also increase the processing load on your graphics card. If your GPU is powerful enough, enable it and see if there is a noticeable visual difference. Use this only if your game doesn’t support it. Anti-aliasing mode and method: Anti-aliasing reduces the “jaggies” around edges, which has a severe impact on performance. If you’re seeing shimmering or jaggies, try the “Override” method and select an anti-aliasing level from 2 to 8. Morphological Filtering (MLAA): AMD introduced its own form of “anti aliasing” to help remove jaggies around the edges in games, which *might* work better and faster than the methods mentioned above or the games built-in methods. It’s a case by case thing: We recommend turning off the in-game AA and the settings above and try it out! If it works, keep it. Texture Filtering Quality: According to AMD this changes the quality of textures. However, even when looking up real close we couldn’t notice a difference between High and Performance, yet many of the tested games ran 1-5 fps faster in the latter. We recommend going with Performance here - you will likely not notice a difference. Surface Format Optimization: Used by older games to decrease graphical fidelity in order to gain a few FPS. Todays games aren’t affected and even on older games. Turn it off. Wait for Vertical Refresh: Vertical Sync (or Vsync) synchronizes the frames that your graphic card renders with the refresh rate of your monitor. If you disable Vsync, you might find that games run more smoothly, however, in most cases, you will notice that some parts of the screen might not be rendered correctly and appear to lag. Disable Vsync only if your monitor has a higher framerate (for example 60hz) than your gameplay (for example 40 FPS). For Intel HD Graphics: Make sure that you’ll select Maximum Performance and disable all the power saving and battery extending options. Last but not least, i'm turning our attention to you AMD Radeon users: Open up your Radeon settings (right-click on your desktop), go to Global Settings and switch off Power Efficiency. 8. Optimise game settings Updating drivers will get you only so far. The biggest gains in frames per second come from tweaking and compromising on graphics settings. Ideally, you want to run your game at your monitor's native resolution. For most PCs that's 1920x1080; on a laptop it's likely to be 1366x768. To find out your monitor's resolution, right-click on the desktop in Windows 7, 8 or 10 and click on 'Screen resolution'. In earlier versions, click 'Properties' instead. The highest selectable resolution should tell you the native resolution, and should say 'recommended'. You can also search Google for your monitor's make and model if you're still unsure. Lowering the resolution should give you more frames per second, but don't adjust the resolution here. Instead, load your chosen game and look for the graphics settings. Here you can change the resolution and many other settings. Anti-aliasing is one setting to watch out for. AA smoothes out jagged lines, but incurs a performance penalty. Typically you'll see a slider, but it might be just a number, such as 2x, 4x 8x etc. First, try disabling AA altogether and see how your game plays. If it's fast enough, you can enable AA again at the lowest setting and progressively increase it until you find the best balance between quality and performance. The same sentiment goes for most other graphics settings, including draw distance and shadows. Lighting effects, including shadows, tend to be real performance drains, so if you can live with basic effects, you can make the difference between a game being unplayable and playable. Essentially, it's a process of trial and error. Unless, that is, your graphics card drivers can optimise each game's settings to work well using the hardware available. For example, the Nvidia card in our test PC has drivers which can do precisely that. That's it from me. I hope it works for you guys. Good luck! You can download download AVG PC TuneUp from here. Also you can download Razer Cortex(Razer Game Booster) from here.1 point
-
Calais to Duisburg Road: Information and Alternative Routes Hi! I’ve decided to write this thread as some advice for people who want to avoid the Calais to Duisburg road in ETS2, whether because you have a serious load you want to do, or if you just don’t like the chaos, or don’t have the time to sit and stare at a queue of traffic for ages- in this case, this is the thread for you! I want to note something before you continue reading: No, I’m not forcing you or others to take the following routes, these are here purely for your reference and you can still take the Calais>Duisburg road should you wish to. Of course, these won’t guarantee you won’t find trolls, but it should hopefully minimise the number of trolls you find on your way. If all you’re here for is to say “Oh, people will still take the Calais>Duisburg road anyway”, you’ve found the wrong thread to reply to. It’s also important to note that as of the latest ETS2 update, the GPS may take a longer but quicker route, so your job may not use the Calais>Duisburg road anyway. This means other alternative routes could end up busier due to GPS routing, so it’s often a good idea to check the traffic conditions here: ets2map.com (Live map of the servers) and https://traffic.krashnz.com/ (Traffic information) Also remember that the alternative routes are mostly motorways which have easier overtaking with 3 lanes, a hard shoulder to stop at, and frequent fuel stops and cities for truck repairs. "Excessive traffic" rules also don't normally apply here, as the motorways are mostly free flowing. First, I think it’s important for those who don’t know what I’m talking about to establish what is the Calais>Duisburg road and what are it’s characteristics? I’ve attached a screenshot of the map here: The Calais>Duisburg road is a country road, starting in France just outside Calais, through Belgium and into Germany, ending just outside Duisburg. It’s single carriageway all the way (One lane in each direction) and contains many bends and hills that can cause easily dangerous driving by those who are inexperienced. There are two small fuel stops, 2 junctions with motorways along the way and a train level crossing, which often causes crashes and queues. The main accident hit points are at these areas. Another important note: If you have an accident or get severe damage, it’s important to get moving as soon as possible. If you just need to repair, use the /fix command, or use F7 + Enter to teleport to the nearest service station. If you’ve tipped, flipped or landed on a roadside barrier, use F7 + Enter to teleport away, to make sure you’re out of the way and the road is made safe again. There are also some "Excessive Traffic" rules specifically made to deal with busy areas such as the Calais>Duisburg road, so take note of these: (Last updated: April 8th, 2018) This road attracts many players, often hundreds at a time. Therefore there’re lots of queues along the way. So therefore, alternative routes are good things to know about in case you need to take a serious load for World of Trucks, or for your VTC, etc. If you’re headed towards Duisburg from the north, you can use this route pictured: Continue on the motorway, past Brussels, towards Liege and Koln, past Dusseldorf and you’re into Duisburg. There’s also another way to Duisburg by going via Amsterdam, pictured here: If you’re going to Calais from the North, you can go via the Brussels>Lille country road, pictured here: Where you’ll rejoin the motorway towards Calais as if you were on the C>D road. If you have time, you could also go from Rotterdam to Calais via the UK, pictured here: Although do remember that the UK drives on the left side of the road, don't get caught making a small mistake! Hopefully, these helped you in some way and you’ve avoided the crowds of the Calais>Duisburg road. Have a safe trip!1 point
-
1 point
-
1 point
-
1 point
-
1 point
-
1 point
-
1 point
-
1 point
-
1 point
-
1 point
-
1 point
-
1 point
-
1 point
-
Today was a tiring day for me but I'm going home and my teammates are waiting for me and then TMP... ???1 point
-
1 point
-
I would just like to announce the opening of my New VTC Apex Logistics https://truckersmp.com/vtc/50865 Hopefully we will see you around at convoys and TruckersMP!1 point
-
1 point
-
1 point
-
1 point
-
[SENIOR COMMUNITY MANAGER] @Matt left the team due to lack of time. We want to thank him for everything he has done for TruckersMP in the past two and a half years.1 point