
- Popular Post
Forerunner
Posts posted by Forerunner
-
-
20 hours ago, ColinShark said:
> Updated the custom heavy haul truck
What's meant with the Heavy Haul Truck? This isn't related to the Special Cargo DLC, is it?
They are not related to any DLC in any way. They are our own custom heavy haul vehicles, previously seen at Real Operations 9. Two of the vehicles were also seen at the Tournament event yesterday.
-
 2
2
-
-
- Popular Post
- Popular Post
[REPORT MODERATOR] @CreatorInDeep transfers from the Report Moderation team to the Add-On Team
-
 39
39
-
 2
2
-
 1
1
-
8
-
9 minutes ago, ScaniaFan89 said:
You just know someone is gonna make a b triple with a long heavy cargo trailer on the end......
That may happen, but if they handle it wrong or cause issues then a punishment would be given as said in the rule itself.
-
Just now, Stabbs [FIN] said:
"If you save edit to create a very long trailer combination but cannot safely handle it" So I could use b-triple (B-link, B-link, normal 3 axle semitrailer) if I don't cause harm?
That is correct
-
 2
2
-
-
14 hours ago, [PRS-TW] TLExpress said:
Is paint job still banned now?
Local paintjobs as they used to be are still banned
-
Thanks everyone for the feedback
 On 2/14/2020 at 1:50 AM, Roccovax said:
I did wonder if it would be possible to have a local mod steering wheel that actually visibly turns
It is possible, you would need to make a local hookup that would attach to the standard steering wheel using the slots made for the steering wheel knobs, and make sure the new model either hid the old one, or use "r_steering_wheel 0" in the console to stop the steering wheel from rendering.
On 2/14/2020 at 1:50 AM, Roccovax said:Also you could use the "entries" in "bus_job_log" to place the new units in, and that shouldn't mess anything up as that does not seem to be used by the game currently
I did some tests with this and found that at some points, could not find out why, it did actually cause a crash upon the profile loading - crashed just before you see the truck in the background. It would not happen all the time, but was able to happen which is why i prefer to use the mail_ctrl, as at least then I can avoid a crash
-
@Beep Boop Coming Through the tools can all be found via a quick google search for each one. As said, this guide is meant for those who have prior experience and therefore most have the tools already
-
- Popular Post
- Popular Post
Local only accessories were banned from use on TruckersMP a long time ago, however local only addon hookups were little-known; and as the rules now state, they are allowed.
However local-only addon hook-ups have never been explained to the public, until now. This guide will show you how to make and use a local only mod. This is a guide for experienced save editors and/or modders; if you are new to modding, I recommend you do not try this as your first mod.
This guide will NOT teach how to make 3d models – only how to make them work in this context. This guide will expect a basic understanding of how the game works and how Blender is used for ETS2/ATS.
During this tutorial, I will be modifying this Iveco Stralis:
Spoiler
Into this:
Spoiler
What you will need:
- Blender (Latest version recommended, though I will be using 2.78a)
- Latest SCS Blender tools & Conversion tools (As with my Blender version, I will be using an older version however it won’t change the guide)
- SCS Save Decryption tool (Such as ‘SII_Decrypt.exe’)
- Text editing tool (I recommend, and will be using, Notepad++)
- Converter_PIX
- Converter_PIX_Wrapper (Optional, I will be using it) or extracted base.scs
Part 1: Blender preparation
If your custom model is just a custom light, horn or similar; you can skip to Part 4.
For models such as custom lightbars, sideskirts and similar, you need to change the position of the model origin. Normally a custom bullbar would attach to the “f_grill” locator on a truck, however in this case the best place to attach it is to a slot on the “b_grill”, meaning that the model will need to be re-positioned.
You will need to import two models, these are:
- The truck that your part will be attached to
- The accessory that your part will attach to
Step 1: Import truck model
Import the truck as normal and then hide all objects except the root.
Step 2: Show correct variant
With the truck root selected, use the “SCS Variants” part of the object menu to unhide parts related to the variant you are using. For example, unhide the “chs_4x2” variant if you are making an addon for a 4x2. Do this for cabin and chassis variant.
Step 3: Hide unnecessary objects
Using the SCS Tools tab on the toolbar, hide all except “model objects” and “model locators”. It should look something like this:
Spoiler
Step 4: Position 3D cursor
To speed up the process of importing the accessory, select the appropriate locator (b_grill for example) and, using the 3D view side bar (Opened with the “n” key by default) copy its Location coordinates to the 3D Cursor coordinates, as below (b_grill is selected in this case):
Spoiler
Step 5: Import accessory model
Import the accessory model as you normally would, because we re-positioned the 3D Cursor, it will be automatically placed on the locator as it would be in-game.
(“Optional”) Step 5a: Rotate accessory model
In some cases, the accessory locator on the truck may be rotated (blue arrow not pointing forward and/or not pointing level). In these cases, set the locator’s Rotation Mode to “XYZ Euler” (on the same sidebar as the 3D Cursor position earlier) and copy its values to the root object of the accessory. Check visually that it matches what you usually see in-game.
Step 6: Hide unnecessary objects
Using the SCS Tools tab on the toolbar, hide all except “model objects” and “model locators”. Same as Step 3. It should look something like this:
Spoiler
Part 2: Your custom part
For this section it is assumed that you already have your custom part ready for use in ETS2/ATS. I will NOT be covering materials or similar in this guide – I am only showing how to make them usable in TruckersMP.
This is the model I am using, it is a fake extra axle, with the wheels in a lifted position – the intention being to mimic a long frame 6x2:
Spoiler
Step 1: Import your custom part
If your custom part is not already in blender, now is the time to import/open it. Position it as it is meant to be in-game. If you are converting an f_grill, position to the f_grill locator.
Step 2: Making the new root
The easiest way to make the new root is to instead change an existing locator to the be the root. Select one of the slot locators on the accessory, it should be named “slot_##” where # is a number (may only be 1 digit) and scroll to the bottom of the objects tab in the properties area. You need to change the Object Type to be “Root Object”. Shown below is before and after:
SpoilerBefore:
After:
!Make a note of the name of the slot, for example “slot_0” as you will need it later!
(“Optional”) Step 2a: configuring your new root
If your new part has multiple variants and/or looks, edit the settings of this new root to match the existing one. Everything shown below should be the same between your existing root and your new root (it may not match mine, but both of yours should match):
Spoiler
Step 3: Moving everything to the new root
Select all the models and locators which make up your new part, do not select any others, and then lastly select the new root – all must be visible in the 3D window.
In the 3D window, press “ctrl + p” and select “Object (Keep Transform)”. If done right, there should be no visual change however if you now check the hierarchy, you will see that the models/locators for your part are now linked to the new root.
Step 4: Exporting your new part
I recommend renaming the new root object from its original slot name to something that you will be able to recognise, in case you ever want to change it again.
The part should be exported to the correct folder this being within “/home”. I will be exporting my model to “<scs_project_path>/home/local_mods/fake_axle_iveco” and it will be named “fake_axle.pim”
Once you have exported it from blender to that folder, you can then run the conversion helper to convert the part to the game format. I recommend not exporting to your mod folder.
Part 3: File structure and edits
Now that you have exported your part, you need to not only copy/move the files to the correct location.
Step 1: The model files (.pmg and .pmd)
For the model files, you need to copy/move them and edit them. Go to your exported mod, and copy the files to your “Documents\Euro Truck Simulator 2” (“Documents\American Truck Simulator” for ATS) folder. In my case the paths change as such:
Move: “<exported_mod>/home/local_mods”
To: “Documents/Euro Truck Simulator 2/local_mods”
The *.pmd file also needs to be edited, as it is likely that it will require materials which are not included in the base game, as such the materials will also need to be in “/home” somewhere, which means the paths in the *.pmd need to be altered.
The easiest way I find to do this is to open the *.pmd in either a Hex Editor or Notepad++ and do a find/replace to find “/automat/” and replace it with “/home/am/”. This works as they are the same number of characters, if the file changes size, then you will need to change more which is outside the scope of this guide.
Step 2: The material files (.mat)
These files only need to be moved, if you are following Step 1 of this part, all you need to do is make a new folder “am” in “Documents\Euro Truck Simulator 2” (“Documents\American Truck Simulator” for ATS) folder and paste all the sub-folders in there.
In my case the paths change as such:
Move sub-folders from: “<exported_mod>/automat”
To: “Documents/Euro Truck Simulator 2/am”
Part 4: Editing your save
Addon hook-ups are different o accessories in that they are not loaded via a file path, meaning simply putting them as a vehicle_accessory or similar will not work, instead you need to get a new unit into the game and then reference it on the correct vehicle_addon_accessory. There are multiple ways you could get a new unit into the save, but many would cause a crash for you either every time or sometimes. Ensure that your save format is set to “2” before doing this.
Step 1: Finding a unit to parent the new units from
The units in the game save are in a hierarchy, all leading back to the ‘economy’ unit at the top of the save. In order for a unit to load, it must be within this hierarchy or the save will not load. You need to re-purpose an existing value in order to make these mods work.
My preferred unit to edit is the ‘mail_ctrl’ which is used for the in-game mail system – this system is used initially for the bank messages and similar but rarely after. If the game needs to use it after the mods are installed, you can either a) edit the save to mark it as read and ignore it or b) uninstall the mods and then reinstall them after reading the message. Entering the mail menu with mods installed this way will cause your game to crash.
There is only one of this unit per save, so simply searching “mail_ctrl” will find it. Mine shows like this, yours should look similar:
Spoiler
Step 2: Modifying this unit
In order to add your custom parts, you need to parent them from this unit. The reason this unit works for this is the “inbox” array, which we can add our mods to. I recommend naming your units something memorable and it is vital they do NOT start with “.” or “_nameless”.
I will be adding two custom parts, the custom model seen throughout this guide but also a hookup which will add the “bonfire” beacon onto a roofbar, to show that existing models can be used.
After initial editing, mine looks like this:
Spoiler
Note that there is a maximum of 12 characters per token in unit names, which are the parts separated by “.” – the last and first parts have the same limit which is why I have “spec_beac” instead of “special_beacon” as the latter is too long.
Step 3: Adding the new unit(s)
This step is rather easy, and involves only adding new units to the save. In most cases, they will be “accessory_hookup_data” however for custom air horns (no other sounds can be done) they will be “accessory_horn_hookup_data” with accompanying “sound_data” units (see existing horn hookups to show how they are set up)
In most cases, all you need to do is add a value for “model” however some models you make may need “variant” and “look” to be defined also. “electric_type” may also be of use for lights however most, beacons included, use aux_light as the value for it.
Below are how the two custom parts for this truck are defined:
Spoiler
Note that the unit names match what we put in the “mail_ctrl” unit, and that the “custom” beacon instead is using the model of a default part – for those wanting local LEDs to put under lights, this is how it is done.
Putting a name, icon and similar is also possible however these units will not be loaded into the menu so will never be seen.
Step 4: Add the new part(s) to your truck
Most save editors will be familiar with this. Simply add a new “slot_name” and “slot_hookup” to the correct “vehicle_addon_accessory” unit and you are done. The “slot_name” value should be the locator name noted earlier (should be “slot_” and then a number) and the “slot_hookup” value should be the unit name of your custom part.
Below are the accessory units for this truck:
Spoiler
And… that’s it! If you did everything correctly, you should now see the truck with the custom parts installed.
Useful Information:
- If you are using custom textures and *.tobj files, these must be located in the "/home" subfolder of the SCS project folder and then copied the same as models.
- Custom "paintjobs" can be made by having a custom model which "wraps" around the original
- This can be done with owned trailers too, using the rear bumper side light slots
Please leave a comment with any feedback you have about the guide. If you have any questions about this guide specifically then ask below, any questions regarding general save editing or Blender should be asked elsewhere.
-
19
-
 13
13
-
3
-
1
-
3
-
 1
1
-
4 minutes ago, Falco [ITA] said:
Sure, local only mods like we all know and loved are not supported anymore. They can be used as hookups and that's harder to do, imo, so my question is this: will there be a guide on "how to adapt SP mods to MP" in the future or not?
ThanksA guide for how to make a mod into a local hookup is currently being written and will be released soon. It won't cover the basics of Blender but will cover how to actually get the mods working. For the LED under spotlight mod, you won't even need Blender to make the LEDs local only (and therefore allowed)
-
3
-
 1
1
-
-
Hello @Baby on Board,
The trucks seen is allowed under the save editing rules and therefore is allowed to be used in TruckersMP, however the only way to make it is with save editing for which topics can be found on the forums.
Kind Regards,
Forerunner
As a side note,
7 hours ago, 049David [GER] said:Due to the fact that the Forerunners Mod was taken down from Steam however,
The mod was not "taken down", I myself manually opted to remove it
-
1
-
3
-
-
Hello,
The rule means that you can have up to 3 (4 in the case of the Scania trucks) accessories ending in "_grill" - this is why the Scania is allowed more than others, as it has the additional "c_grill" slot. The rule is based on the number of these on the truck overall (not per slot) and the addon hookups used on the bars does not impact on how the rule is applied.
Kind Regards,Forerunner
Vice Project Manager
-
Hello,
It is indeed bannable. Beacons are only permitted on the "r_grill" and LED strobe lights can only be on default slots.
Kind Regards,Forerunner
Vice Project Manager
-
Hello,
If you are asking about having a bullbar clipping through the front of the truck, it is allowed.
Kind Regards,Forerunner
Vice Project Manager
-
1
-
-
Hello,
From the image shown, it appears to be allowed though it does not show all parts of the truck.
Kind Regards,Forerunner
Vice Project Manager
-
Hello,
This is allowed to be used in TruckersMP, thank you for checking with us.
Kind Regards,Forerunner
Vice Project Manager
-
Hello,
These mods are not able to be used within TruckersMP.
Kind Regards,Forerunner
Vice Project Manager
-
Hello,
I am unfortunately unable to see the image, as such I cannot judge the vehicle.
Kind Regards,Forerunner
Vice Project Manager
-
Hello,
This is not possible via save editing within TruckersMP.
Kind Regards,Forerunner
Vice Project Manager
-
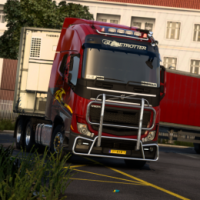
Hello,
From the image, the truck appears to be allowed.
Kind Regards,Forerunner
Vice Project Manager
-
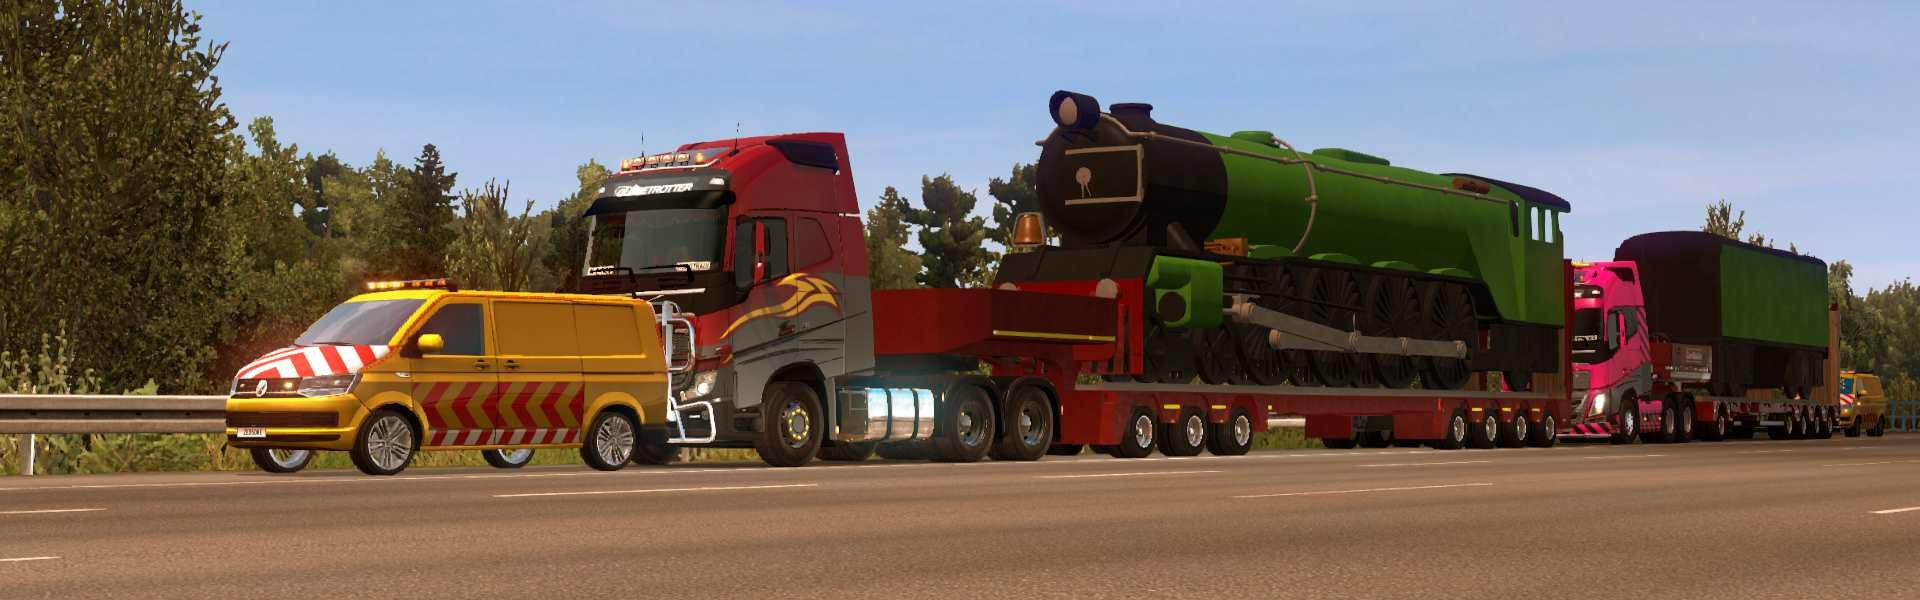
Hello,
This is not allowed to be used within TruckersMP. The rear cargo is from the Special Transport DLC - see this blog for more information https://truckersmp.com/blog/152
Kind Regards,Forerunner
Vice Project Manager
-
Hello,
Your trailers can be used on TruckersMP as they are within our rules.
Kind Regards,Forerunner
Vice Project Manager
-
Hello,
This trailer is able to be used on TruckersMP. Thank you for checking with us.
Kind Regards,Forerunner
Vice Project Manager
-
Hello,
Under the current set of rules this is allowed; however recommended against as you could easily get stuck and block roads with this combination.
Kind Regards,Forerunner
Vice Project Manager
-
1
-
-
Hello,
Your truck is permitted for use within TruckersMP. Thank you for checking with us.
Kind Regards,Forerunner
Vice Project Manager


TruckersMP Team
in News
Posted
[GAME MODERATOR] @.Quality has joined the Add-On Team as an additional role.